Set up the experimental Windows beta
Configure phrase-by-phrase local recognition, reviewable text options, voice profiles, user-triggered Piper output, and optional VB-CABLE routing. DysVoxa is experimental testing software and must not be relied on for safety-critical communication.
System requirements
The current runtime target is CPU-only. This reference configuration is used for timing and packaging work; it is not a guarantee of recognition quality or response time.
Windows 10 or 11 (64-bit)
The current product target; Linux release is deferred.
16 GB RAM
Used by the current reference computer.
Four-core CPU
Intel i5-8250U-class reference; no dedicated GPU is intended to be required.
3 GB disk space
Allow room for the application and local models.
Microphone and output
A microphone plus speakers or headphones are required.
Installation
The beta is distributed as a Windows installer with local speech models. Obtain it only through an official DysVoxa channel and compare the file and publisher information with the release notes.
1. Run the installer
Use only a build obtained from an official DysVoxa channel. If Windows SmartScreen appears, verify the file, publisher information, and release notes before choosing whether to continue.
2. Accept the license
Review the MIT license text, select I accept the agreement, and click Next.
3. Choose install location
Confirm the destination shown by the installer, change it if needed, and click Next.
4. Install and finish
Click Install. Approximately 1.3 GB of model files are copied. A desktop shortcut and Start Menu entry are created automatically.
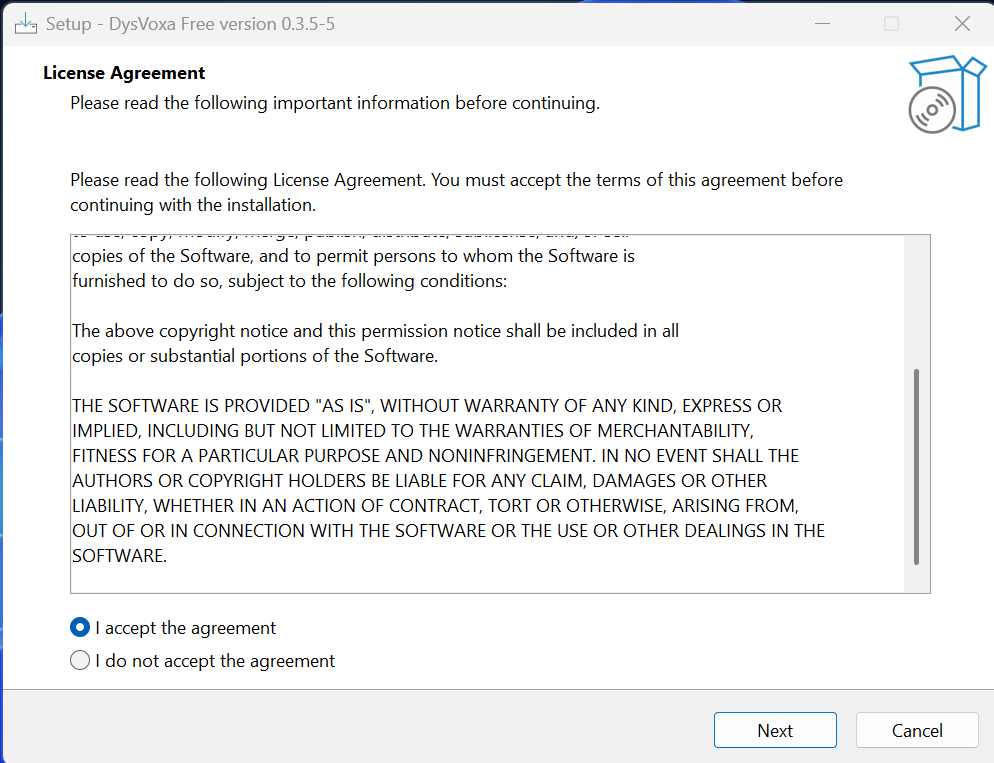
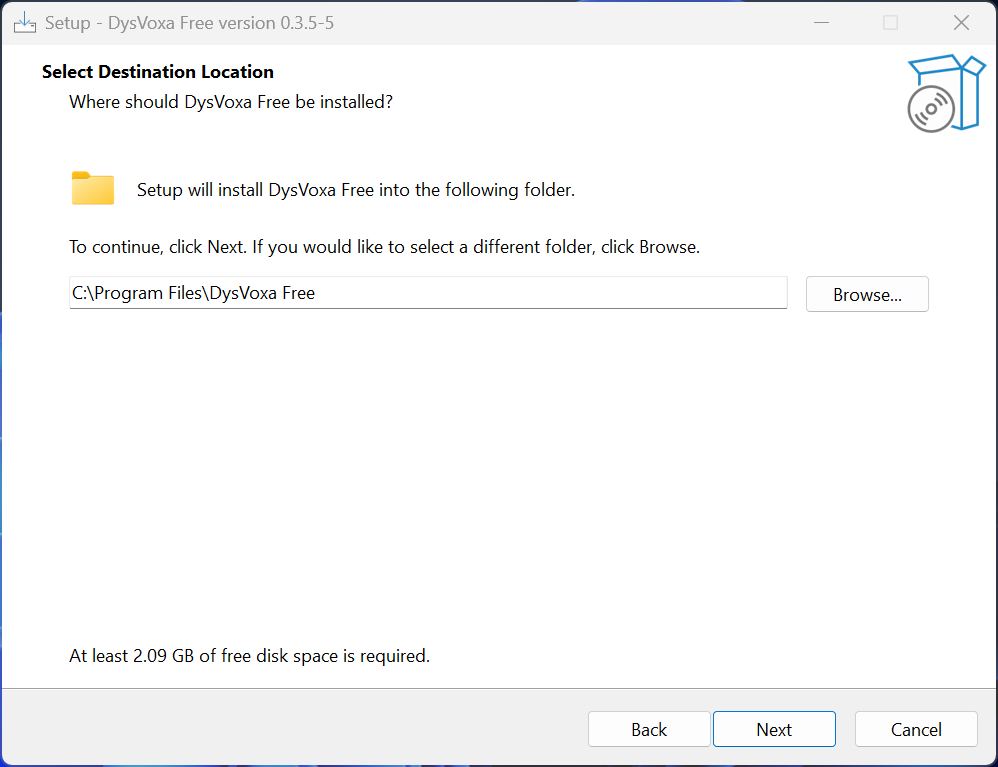
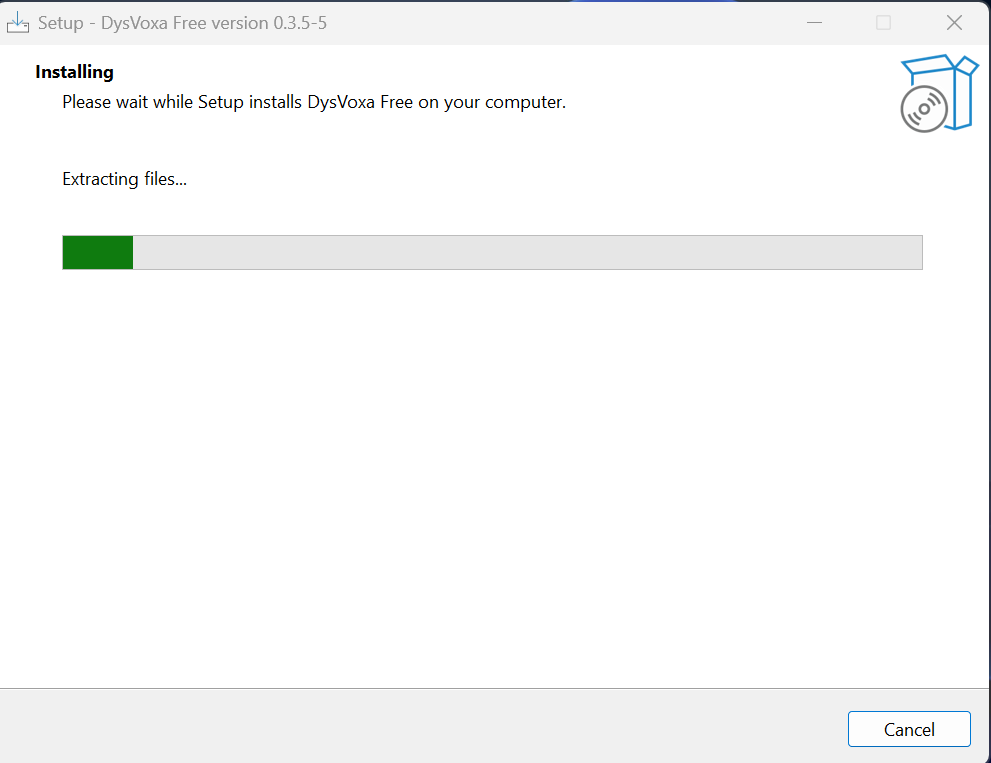
Windows SmartScreen warning: A beta build may trigger a blue “protected your PC” screen. Do not continue automatically. Verify that the download came from an official channel and that its file and publisher details match the current release information; contact support if they do not.
First launch — setup wizard
On first launch, DysVoxa opens the Setup tab with two guided steps: Devices and Voice Profile.
Step 1 — Devices
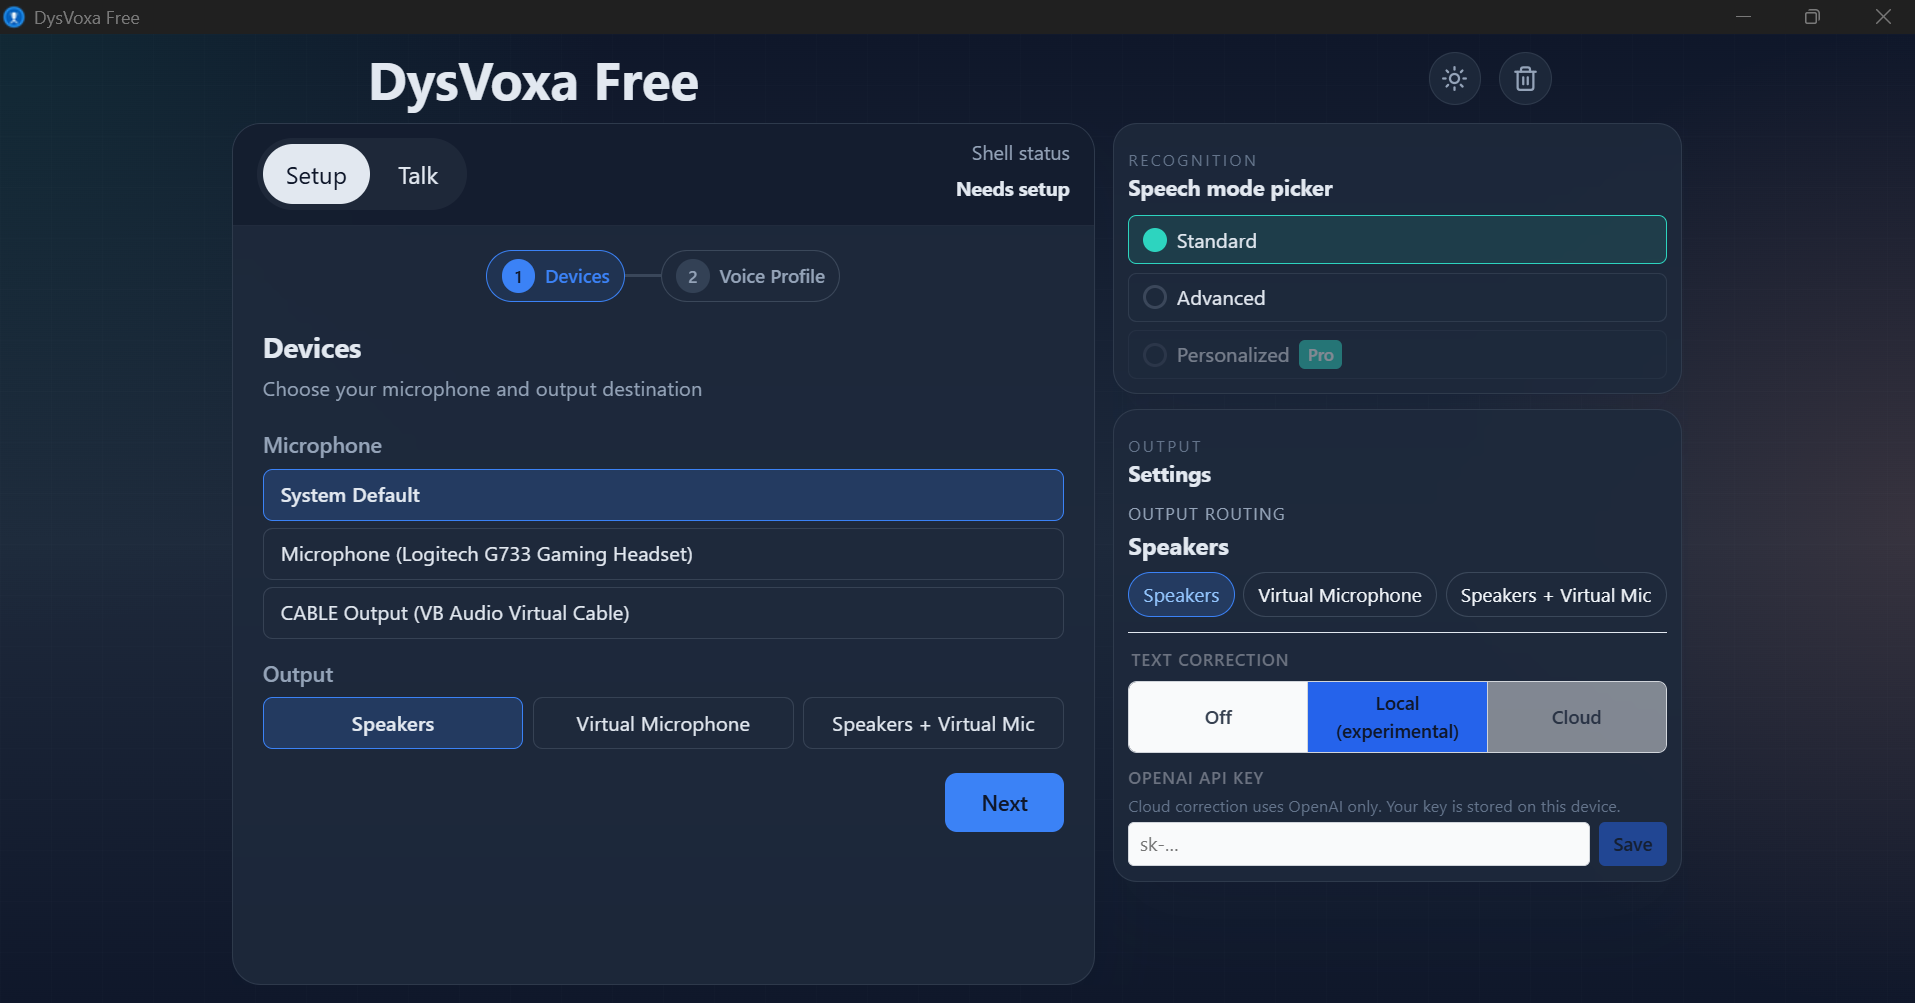
- Microphone: select your microphone from the list. If none appears, the system default is used.
- Output routing: choose where the user-approved synthesized phrase plays - speakers, virtual microphone, or both.
- Virtual microphone: DysVoxa uses the third-party VB-CABLE driver and does not install a custom audio driver of its own. Review VB-Audio's terms and the current release instructions before installation.
- Click Next to proceed to the Voice Profile step.
Output routing options
Speakers
Play the user-chosen synthesized phrase through speakers or headphones for face-to-face testing.
Virtual microphone
Send synthesized speech through VB-CABLE to another app's input. This call path is experimental and must be tested with a remote partner before use.
Speakers + virtual mic
Send output to both paths simultaneously. Remote audibility is not yet formally proven in Zoom or Microsoft Teams.
Step 2 — Voice profile
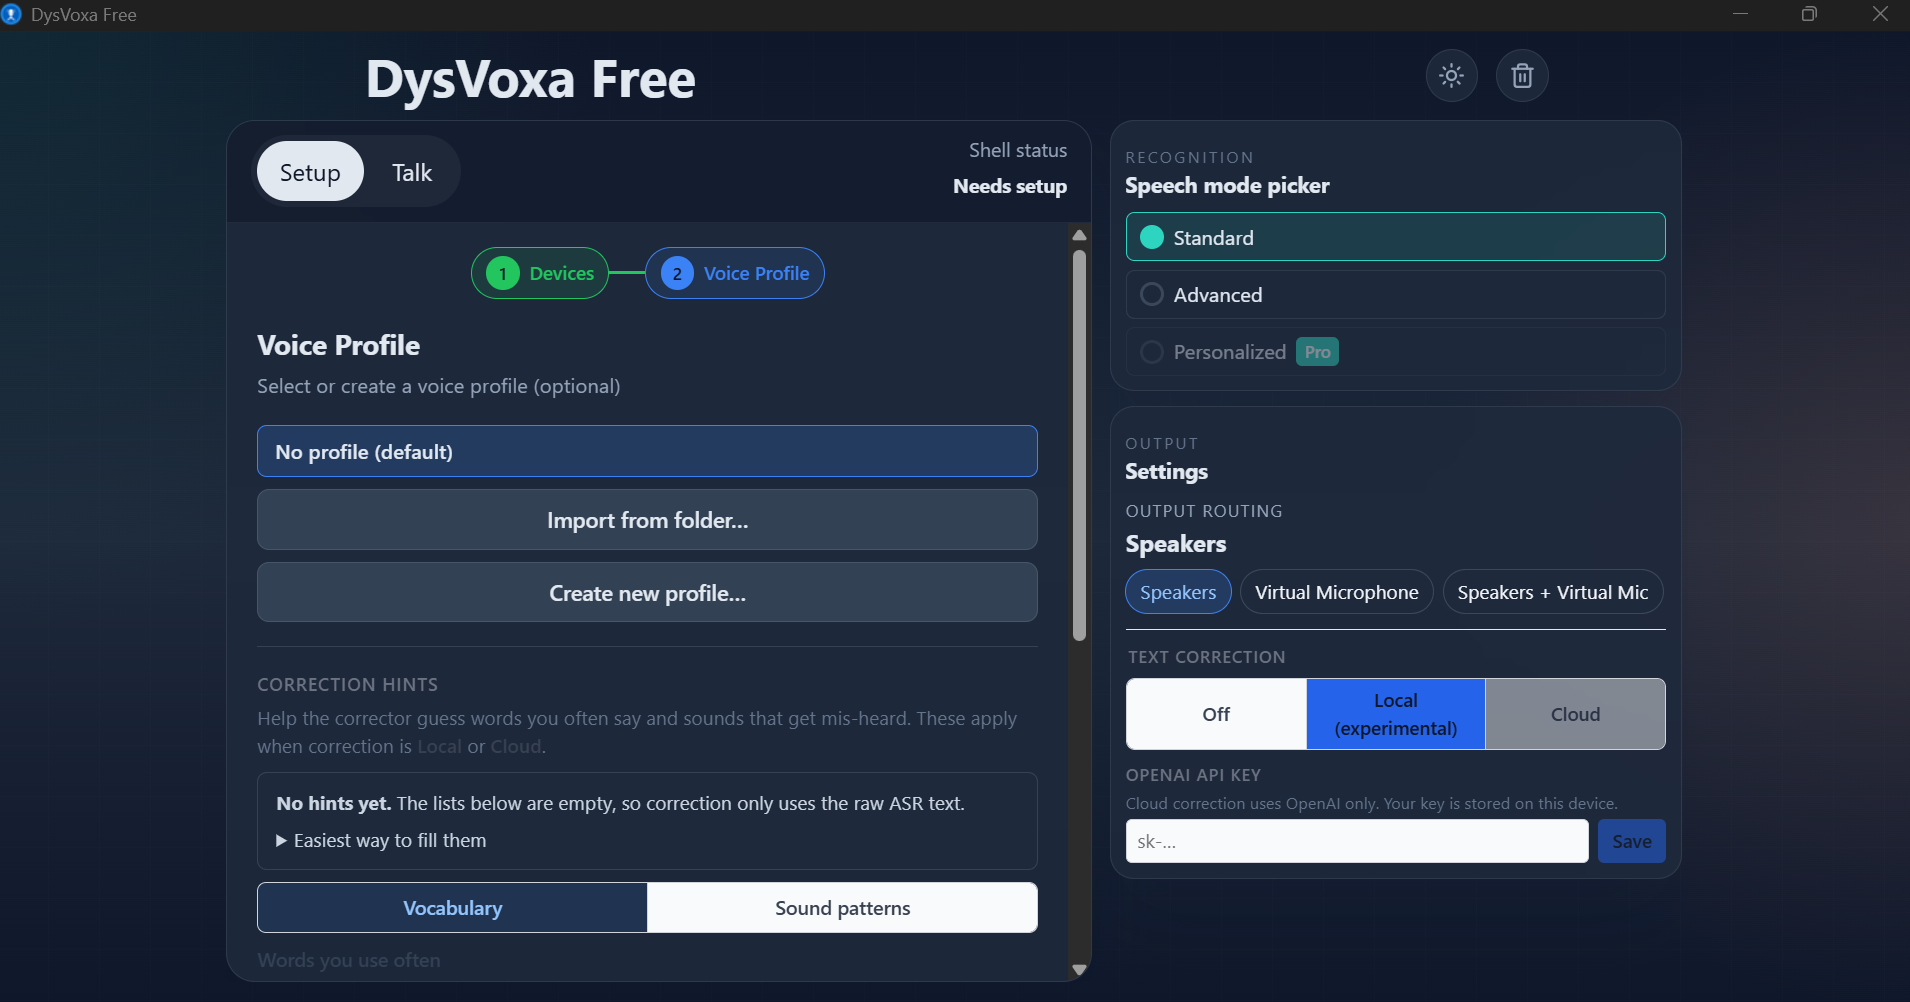
- Use a profile: select an existing profile from the list and click Next.
- Create a new profile: add a name and enroll phrases, vocabulary, or recordings as local evidence. The fixed Parakeet and Whisper models are not retrained.
- Skip for now: try the app without a profile. You can create one later from the Setup tab.
After completing or skipping the Voice Profile step, click Next to finish setup. The app is ready — switch to the Talk tab.
Using the Talk screen
The Talk tab records one short phrase, shows recognition and any available alternatives, and waits for the user to choose or edit the text before speech.
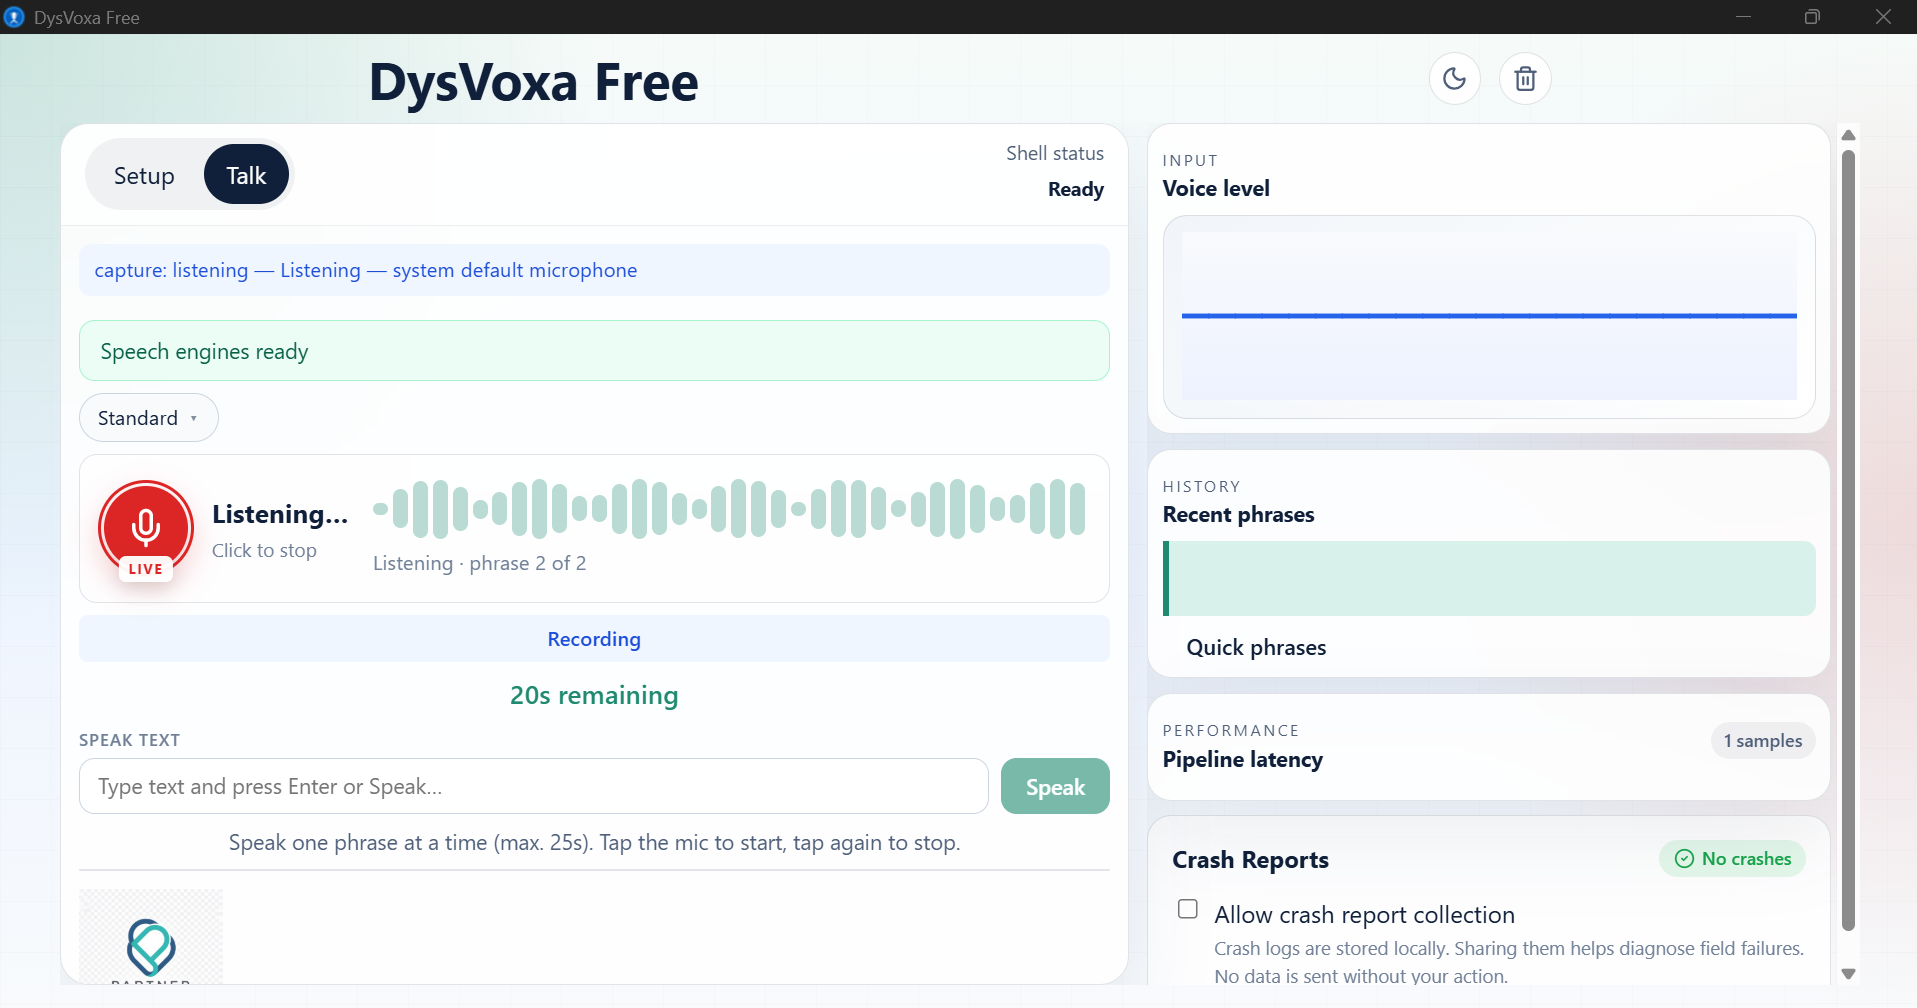
1. Start recording
Start recording, speak one short phrase - normally around 2–15 words - and stop when it is complete.
2. Inspect recognition
Review the local Parakeet or Whisper result. A fluent-looking transcript can still be wrong.
3. Choose or edit
Compare available interpretations, keep the original, edit or type different text, use a quick phrase, or cancel.
4. Press Speak
Only an explicit Speak action sends the chosen text to Piper and the selected output path.
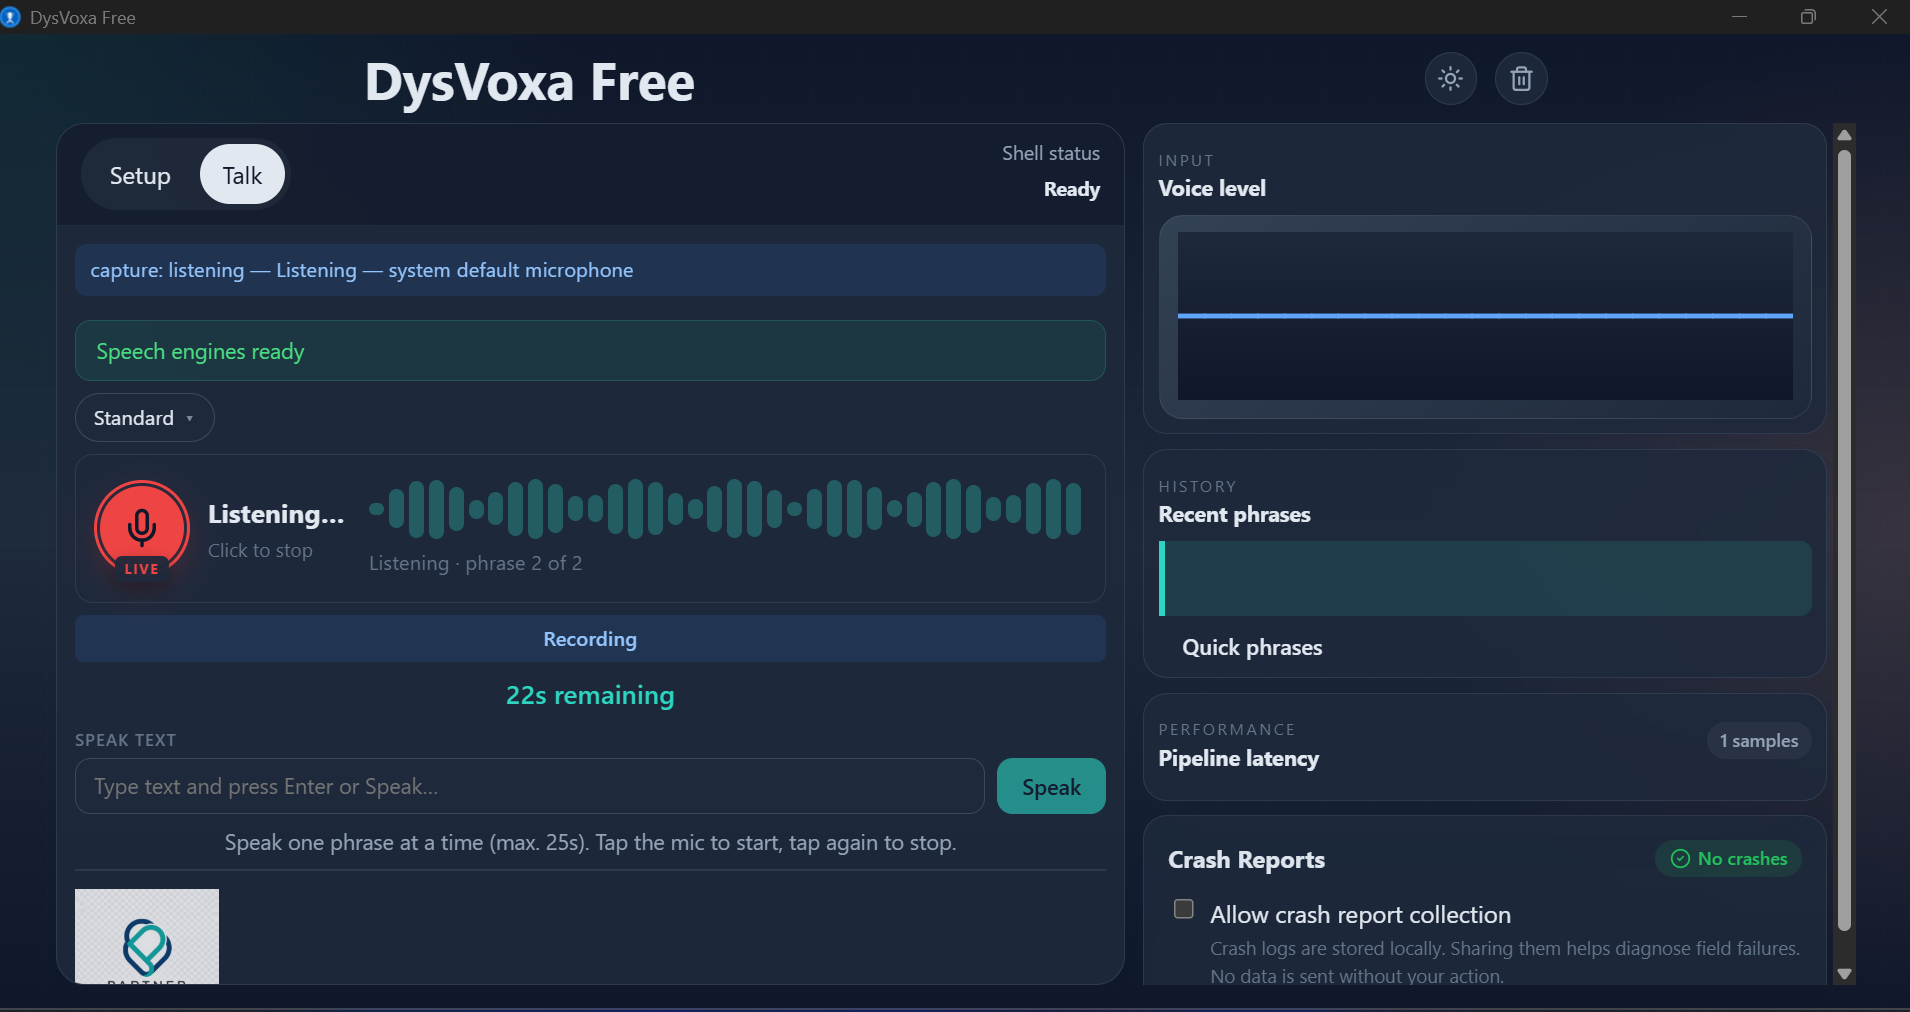
Toggle dark mode with the sun/moon icon in the top-right corner. For experimental call routing, DysVoxa sends audio to “CABLE Input” while the call app normally selects “CABLE Output” as its microphone. Remote audibility in Zoom and Microsoft Teams has not yet passed formal testing; test with a call partner first.
Settings — recognition, output, and suggestions
The settings select a recognizer, an output path, and whether to request correction suggestions. No mode guarantees the intended phrase or a better result.
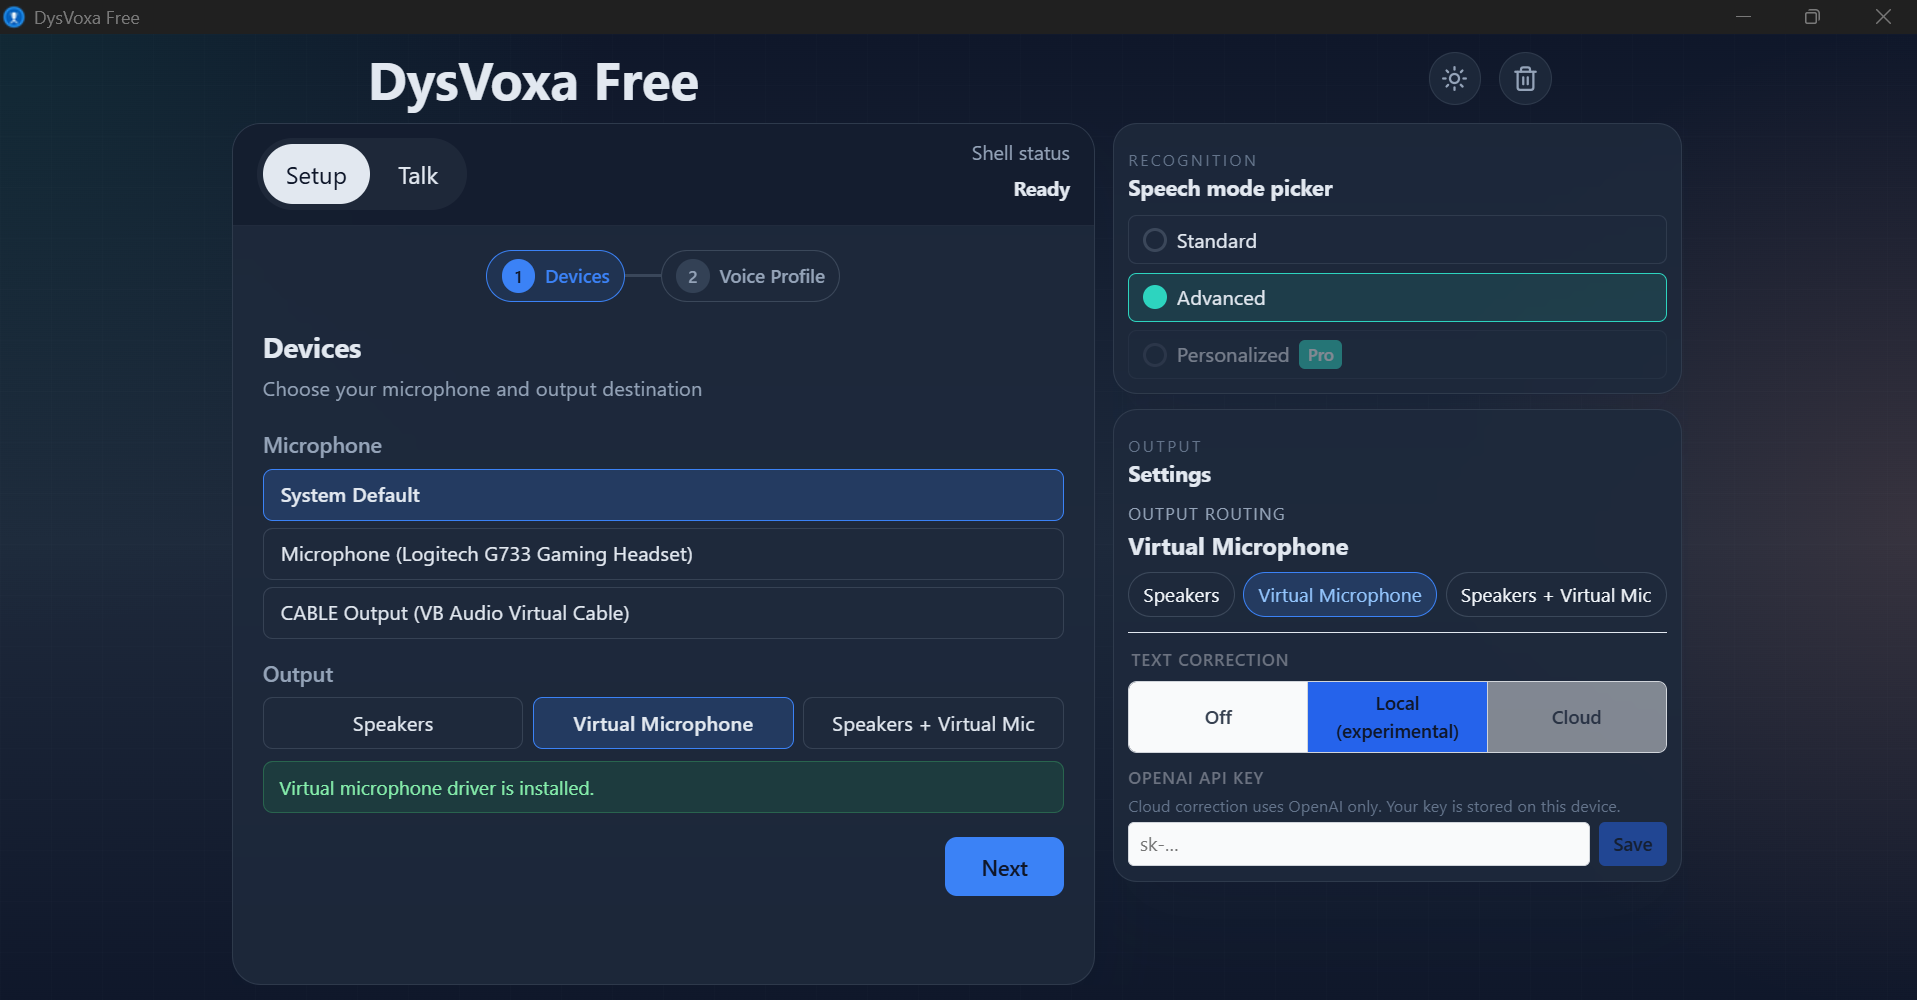
Speech mode
Standard — Parakeet
The main, faster local recognition mode. It can still return incomplete, unrelated, or fluent but wrong text.
Advanced — Whisper
A different local recognizer that may interpret the phrase differently and can take longer. It is not guaranteed to be more accurate.
Text correction
Off
Do not request correction suggestions. Review the original recognition, edit it, type new text, or cancel.
Local (experimental)
Conservative deterministic rules and saved user evidence run on the PC. This mode has not shown a general phrase-level accuracy improvement.
Cloud (optional BYOK)
Send recognized text and relevant text context to a user-configured provider for another suggestion. Quality is not guaranteed; microphone audio is not sent.
Using Cloud correction: Deliberately select Cloud, enter a compatible provider key, and save. Windows protects the saved key locally with Data Protection API facilities. Recognized text and relevant saved text context may be sent under the provider's billing, retention, and service terms.
Uninstall
DysVoxa can be uninstalled from within the app or via Windows Settings.
- In-app: click the trash can icon in the top-right corner, then click again within 4 seconds to confirm. The icon turns red on first click as a safety measure.
- Windows Settings: Settings → Apps → select the installed DysVoxa beta → Uninstall.
- Manual: use the uninstaller in the destination selected during installation.
Troubleshooting
Common issues and their solutions. For additional help, email support@dysvoxa.com.
App does not launch
Ensure your system meets the requirements. Try running as administrator. Check that your antivirus did not quarantine the executable.
No microphone detected
Verify the microphone is recognized in Windows Settings → System → Sound → Input. Try a different USB port. Restart the app after connecting.
Virtual microphone not working
Restart the app after installing VB-CABLE. In your target app, select CABLE Output (VB-Audio Virtual Cable) as the microphone input.
Cloud correction not working
Verify your cloud API key is saved and has sufficient credits. Check your internet connection.
Speech recognition is slow
Switch to Standard mode. Close other CPU-intensive applications. Ensure at least 16 GB RAM.
Text correction makes errors
Treat every option as a suggestion. Compare the original, try the other recognizer, edit or type the intended text, use a quick phrase, or cancel and try again.
Before you rely on a result
DysVoxa is experimental testing software. Recognition and suggestions can be wrong, and experimental call routing may fail.
- Review, choose, or edit every phrase before pressing Speak.
- Use extra care with negation, requests for help, medicines, quantities, names, places, dates, and times.
- Do not use DysVoxa as the only way to communicate in an emergency, medical, or other safety-critical situation.
- Keep an established fallback method available and test VB-CABLE with a call partner before depending on it.
Need help with testing?
Review the current demos, explore how the workflow operates, or register interest in testing when access is available.
Fund dysarthria speech recognition that stays free to use.
One-time donations, Indiegogo backing, and organizational sponsorship pay for safety work, Windows packaging, and broader evaluation. SIA DysVoxa is a registered company in Latvia, so gifts may not be tax-deductible.